Students
Student user guide
How to see your lessons, access documents and join online sessions in Learn.AEC.
Thank you! Your submission has been received!
Oops! Something went wrong while submitting the form.
On this page
Student user guide
Dashboard
Upcoming lessons
Calendar
Monthly view
Documents
Uploading & viewing
Emails
Lesson reminders
Teams
Pre-join screen
In lesson
Passwords & MFA
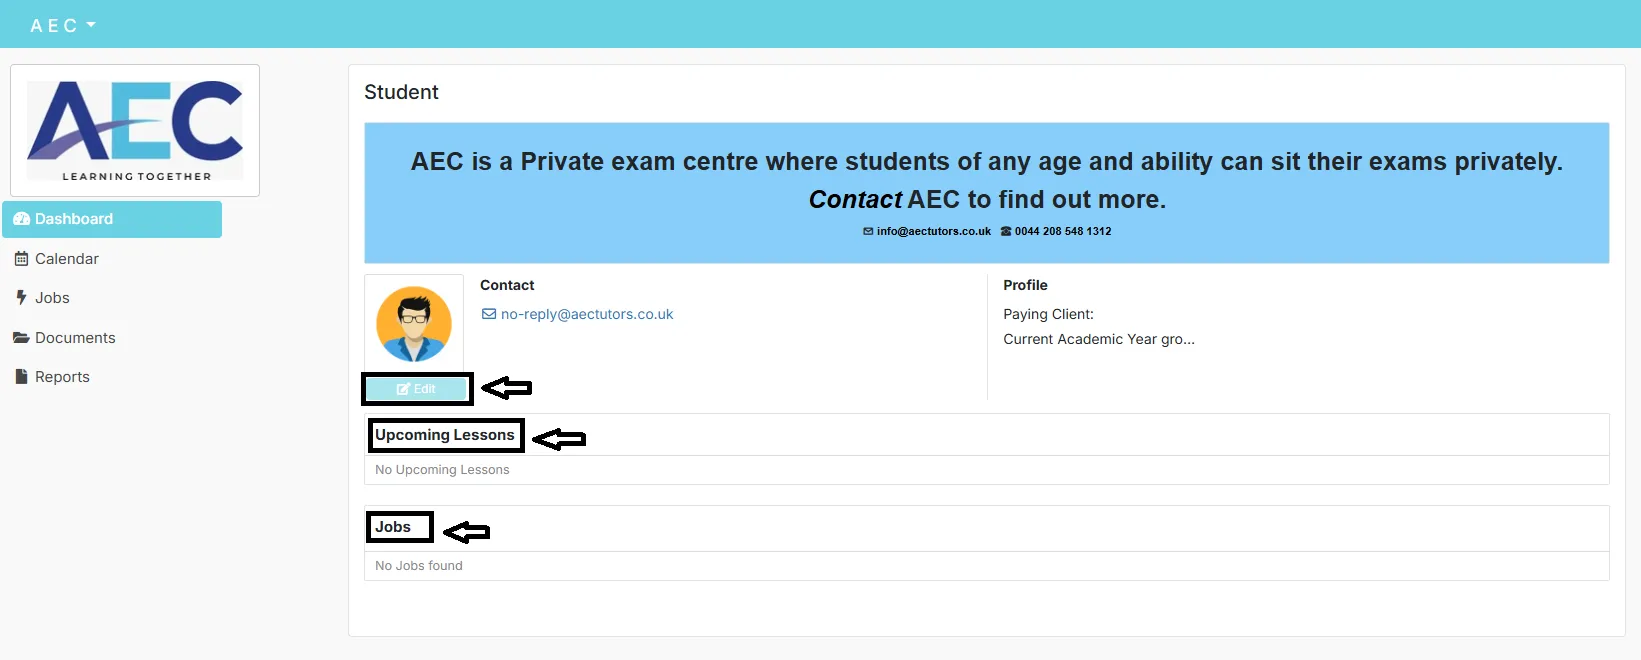
Dashboard
Student dashboard – upcoming lessons
When you log in, you’ll see your Student dashboard. This shows your profile, contact details and your Upcoming Lessons panel.
- If you have no lessons booked, it will say “No Upcoming Lessons”.
- When lessons are booked, you’ll see the date and time here.
- Use the left-hand menu to move to Calendar, Jobs, Documents and Reports.
Check the dashboard first if you’re not sure whether you have a lesson.
Calendar
Calendar – monthly lesson view
The Calendar shows all your lessons in a monthly view so you can see what’s coming up at a glance.
- Open the Calendar from the left-hand menu.
- Use the arrows to move between months and days.
- Click on any day or lesson entry to see more information.
The calendar helps you plan around school, exams and other activities.
Documents
Viewing and uploading documents
Your Documents area is where you can see files your tutor or AEC have shared with you, and upload files back to them.
- Open Documents from the left-hand menu.
- View all documents that have been shared with you.
- Use Single Document Upload to upload your own file.
When you click to upload a document, you’ll see an upload screen:
- Drag and drop a file into the highlighted area, or click to choose a file.
- Add a short Description (e.g. “Homework – Algebra wk3”).
- Click Submit to finish uploading.
Use this to upload homework, coursework or any files your tutor asks for.
Emails
Lesson reminder emails
Before a lesson, you’ll receive an automated lesson reminder email with everything you need:
- Lesson ID and date/time.
- Topic or subject for the lesson.
- Microsoft Teams lesson link.
- Student name.
- Tutor name and email address.
The email also includes guidance about cancelling or rescheduling and information about recording and safeguarding during online lessons.
Keep these emails safe – they are often the quickest way to find your Teams link.
Microsoft Teams
Joining your online lesson – pre-join screen
When it’s time for your online lesson, click the Microsoft Teams link in your reminder email or from within the platform. You’ll first see the pre-join screen.
- Check or change your audio settings (speakers / headset).
- Turn your camera on or off.
- Make sure your microphone is working.
- Click Join now when you’re ready.
Join a couple of minutes early to check your sound and camera before the lesson starts.
In lesson
Inside the lesson – Microsoft Teams screen
Once you’ve joined, you’ll see the main Microsoft Teams lesson screen. There may also be a message confirming that the meeting is being recorded.
- Use the toolbar to turn your camera and microphone on or off.
- Open the Participants list to see who is in the lesson.
- Use the Chat for messages or links from your tutor.
- Share your screen when your tutor asks you to.
- Click Leave when the lesson ends.
If you see “Waiting for others to join…”, it just means the tutor or another participant has not joined yet – stay in the meeting until they arrive.
Couldn’t find the right information?

© AEC Tutors