Tutors
Tutor user guide
How to use Learn. AEC as a tutor – dashboard, lessons, account, security and getting paid.
Thank you! Your submission has been received!
Oops! Something went wrong while submitting the form.
On this page
Tutor user guide
Start
Getting started
Dashboard
Using your dashboard
Lessons
Scheduling & managing lessons
Account
Account & profile
Security
Security & data
Login
Passwords & MFA
Payments
Stripe payouts account
Start
Getting started with Learn.AEC (tutors)
Learn.AEC is AEC Tutors’ online platform, powered by TutorCruncher, where you manage lessons, jobs and payments. When you log in, you’ll land on your Learn. AEC dashboard.
Dashboard overview
Lessons
Account & profile
Security & MFA
Stripe payouts
As a tutor, you’ll use Learn. AEC to:
- Check upcoming jobs and lessons.
- Update your profile and contact details.
- Control your password and Multi-Factor Authentication.
- Connect and manage your Stripe payouts account.
Tip: Bookmark the Learn.AEC login page and always log out if you’re on a shared device.
Dashboard
Using your Learn.AEC dashboard
Your Dashboard is your “home” inside Learn.AEC. It gives you a quick overview of what is coming up and any important notices from AEC.
Upcoming lessons & jobs
- See your next jobs and lessons at a glance.
- Check dates, times and student names.
- Click any item to view full details.
Notices & quick links
- Important messages from AEC.
- Shortcuts to jobs, lessons and account.
- Profile avatar in the top-right for settings.
As AEC adds features, your dashboard layout may change, but it will always focus on what you need next.
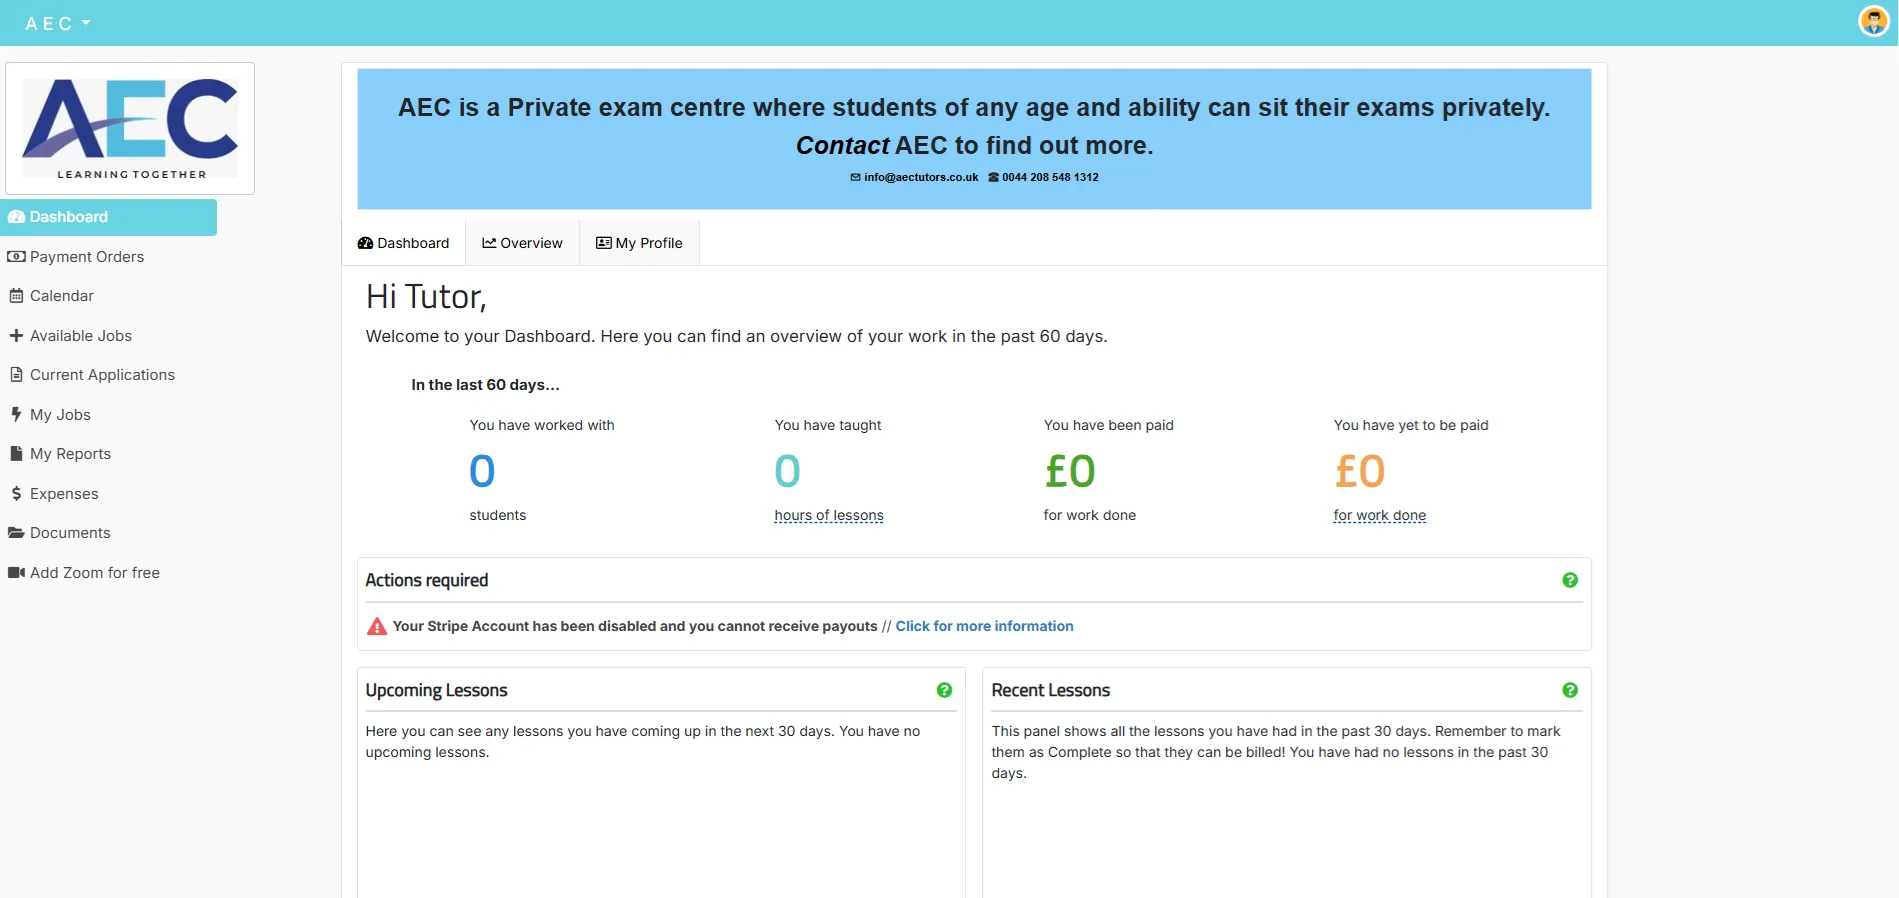
Example dashboard: upcoming lessons, job overview and notices in one place.
Lessons
Scheduling, editing & managing Lessons
In Learn.AEC, a Lesson is any specific tutoring appointment between a student and a tutor – one-off, part of a course, or recurring. Lessons sit inside Jobs and drive what clients are charged and what tutors can be paid.
Where to find Lessons
- From a Job: open a Job and use the Lessons panel for all sessions in that Job.
- From the Calendar: go to Activity > Calendar for a calendar or list view of all Lessons across AEC.
- Click any Lesson to see its status, date/time, students, tutor, location, charge rate and pay rate (only admins see both rates).
Each Lesson page also has tabs for Accounting (Invoices, Credit Requests, Payment Orders), Activity (ad hoc charges, attendance) and Documents/Notes.
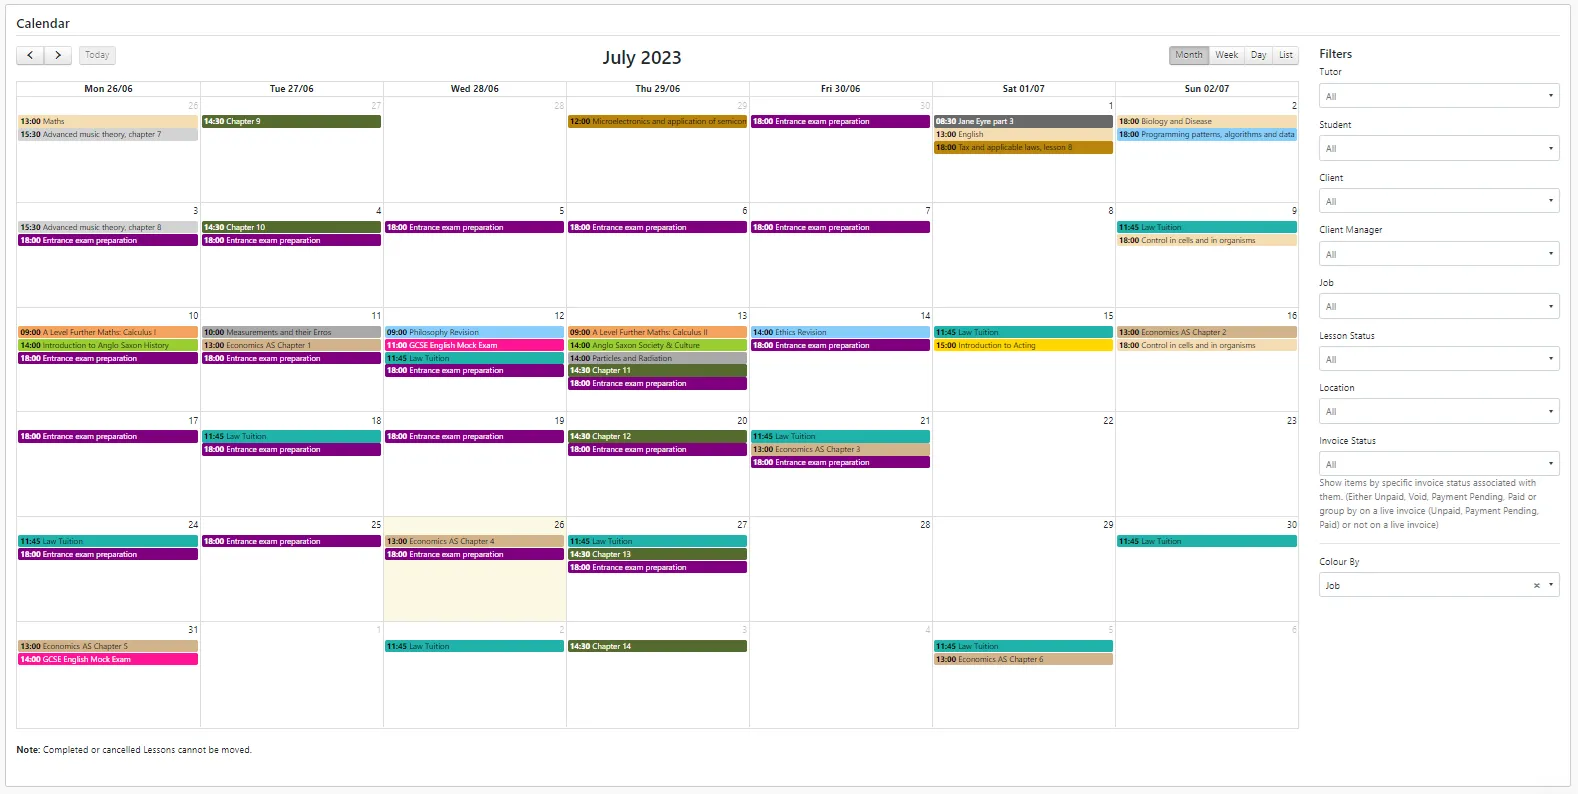
Lessons in Calendar view: see all upcoming sessions and click through for full details.
Creating & recording Lessons
Lessons are always attached to a Job, so you must have a Job first.
Create via a Job
- Create or open the relevant Job.
- In the Lessons panel, click Add new Lesson.
- Set the date, time, topic title, attending students/tutors and location.
- Submit to create a Planned Lesson (future) or Complete Lesson (if the start time is in the past).
Create via the Calendar
- Go to Activity > Calendar.
- Click Add new Lesson.
- Select which Job the Lesson belongs to.
- Set date/time, topic, attendees and location, then submit as above.
Any Lesson created in the past is recorded immediately as Complete and you’ll be prompted to write a Lesson report.
Lesson statuses
- Planned: set for a future date/time.
- Awaiting confirmation: the scheduled time has passed but the Lesson hasn’t been marked Complete or Cancelled yet.
- Complete: marked as delivered; will be included in invoices and tutor payment orders.
- Cancelled: not chargeable; excluded from invoices and payment orders.
- Cancelled but chargeable: client can still be billed even though the Lesson did not go ahead.
Cancelling Lessons
Cancel a Lesson
- Open the Lesson’s main page.
- Click Cancel.
- (Optional) add a reason in the Cancel Lesson panel.
Cancelled Lessons remain visible on the Job and in Lesson lists but are not invoiced or paid.
Cancel but still charge
- On the Lesson page, click the down arrow next to Cancel.
- Choose Cancel but still charge.
- Status becomes Cancelled but chargeable and the Lesson can still be invoiced.
Useful for late cancellations that fall inside your cancellation policy window.
How clients pay for Lessons
Every completed Lesson creates charges for the relevant Client(s) based on the Client charge rate × Lesson units. These charges appear on invoices or credit requests.
- Invoices: bill for Lessons that have already taken place.
- Credit Requests: pre-pay for future Lessons.
- See all related invoices/credits on the Lesson’s Accounting tab.
- Auto Invoicing: can automatically send an invoice when a Lesson is marked complete (and can enforce Lesson reports).
How tutors get paid for Lessons
Tutor payments are tracked via Payment Orders. These are raised from the accounting area and can be viewed on each Lesson’s Accounting tab.
- Payment Orders show how much a tutor is owed for the Lesson(s).
- Once paid, they form a clear record for both AEC and the tutor.
Editing, deleting & special cases
- Lessons with associated invoices or payment orders, or Lessons on Jobs marked Finished, cannot be edited until those are voided / Job re-opened.
- To delete a Lesson: go to Actions > Delete on the Lesson page. You can’t delete if invoices/payment orders exist.
- Clients can book & cancel Lessons from their dashboard/calendar (students cannot).
- Extra fees/expenses are added as Ad Hoc Charges from the Lesson’s Activity tab.
- You can override a student’s default charge rate for a specific Lesson via the Students panel (edit charge rate).
Attendance & reports
For Lessons with multiple students, mark attendance using the buttons in the Students panel:
- ✔ Attended – chargeable
- ✖ Did not attend – not chargeable
- $ Did not attend – chargeable (late cancellation)
With only one student, you can instead set the Lesson status to Cancelled or Cancelled but chargeable.
Admins can also generate attendance reports across Lessons if needed.
Repeating Lessons
For regular weekly/daily sessions, use repeated Lessons instead of creating each one manually.
- Create the Job and the first Lesson in the series.
- On that Lesson, go to Actions > Repeat.
- $ Did not attend – chargeable (late cancellation)
- Choose frequency (daily/weekly), which days of the week, and how long the series should run (stop date or number of repetitions, up to 50).
- Use Check conflicts to confirm the location is free (if using locations).
Editing repeated Lessons
- Open the Lesson you want to change and choose Actions > Edit.
- Adjust date/time/location/title; tick Apply changes to future repeated appointments to update the rest of the series.
- Existing time offsets are preserved (each future Lesson is shifted by the same amount rather than all being set to an identical time).
Deleting or stopping a repeating series
- Find the original Lesson in the series (via “More details” on any repeated Lesson > View original Lesson).
- To remove future repeats: go to Actions > Repeat and set Repeat = Never or adjust the stop date.
- Only Lessons marked Planned are deleted; completed Lessons remain for your records.
Account
Managing your account & profile
Your Account page is where you update your personal details, email preferences, password and security settings.
Account settings: profile, password, MFA, notifications and account erasure.
To open your Account page:
- On the dashboard, go to the top-right corner.
- Click your profile avatar or initials.
- Select Account from the menu.
Profile details
- Keep your name and contact details up to date.
- Ensure your address matches your bank’s country if you use an international bank account.
Email notifications
- Control which emails you receive from AEC.
- We recommend keeping lesson / job notifications switched on.
Requesting account erasure
- Open your Account page.
- Click Request Account Erasure.
- Add any comments to explain why you want your data removed.
- Click Save to send the request.
AEC will review your request and remove your data in line with our privacy policy.
Security
Security & data protection
Learn.AEC uses TutorCruncher, which stores its data securely on Heroku servers in Dublin (hosted on Amazon Web Services). TutorCruncher holds recognised security certifications and is regularly assessed.
How your data is protected
- Industry-standard encryption and access controls.
- Regular security assessments and testing.
- Clear internal policies for handling personal data.
Your responsibilities
- Use a strong, unique password.
- Enable MFA for extra protection.
- Log out on shared or public computers.
No system is 100% secure – good habits (strong passwords, MFA, logging out) make a big difference.
Login
Passwords & Multi-Factor Authentication
Manage your password and Multi-Factor Authentication on the Account page. Use the steps below to stay secure.
Change your password?
- Go to your Account page.
- Click Change Password.
- Enter your current password, then your new password twice.
- Click Submit.
You’ll be logged out and will need to sign back in with your new password.
I’ve forgotten my password
- On the Learn.AEC login page, click Reset Password.
- Enter your email address and click Reset.
- If your email is valid, you’ll receive a reset link.
Check your spam/junk folder if you can’t see the email. AEC can resend your welcome email if needed.
Enable Multi-Factor Authentication (MFA)
MFA adds a 6-digit code from your phone on top of your password. Even if someone knows your password, they can’t log in without this code.
- Open your Account page.
- Click Enable Multi-Factor Authentication.
- Install an authenticator app (Authy, Google Authenticator, Microsoft Authenticator, etc.).
- Scan the QR code or enter the code provided into the app.
- Enter your password and the 6-digit code and click Enable.
Only disable MFA if you’re confident your account and devices are secure.
Disable Multi-Factor Authentication
- Open your Account page.
- Click Disable Multi-Factor Authentication.
- Enter your password and a 6-digit code from your authenticator app.
- Click Disable.
You’ll be logged out and will need to sign back in with your new password.
Payments
Stripe payouts account (tutors)
A Stripe payouts account allows AEC Tutors to pay your share of client payments directly into your bank account. Payouts accounts are required when jobs use split payments.
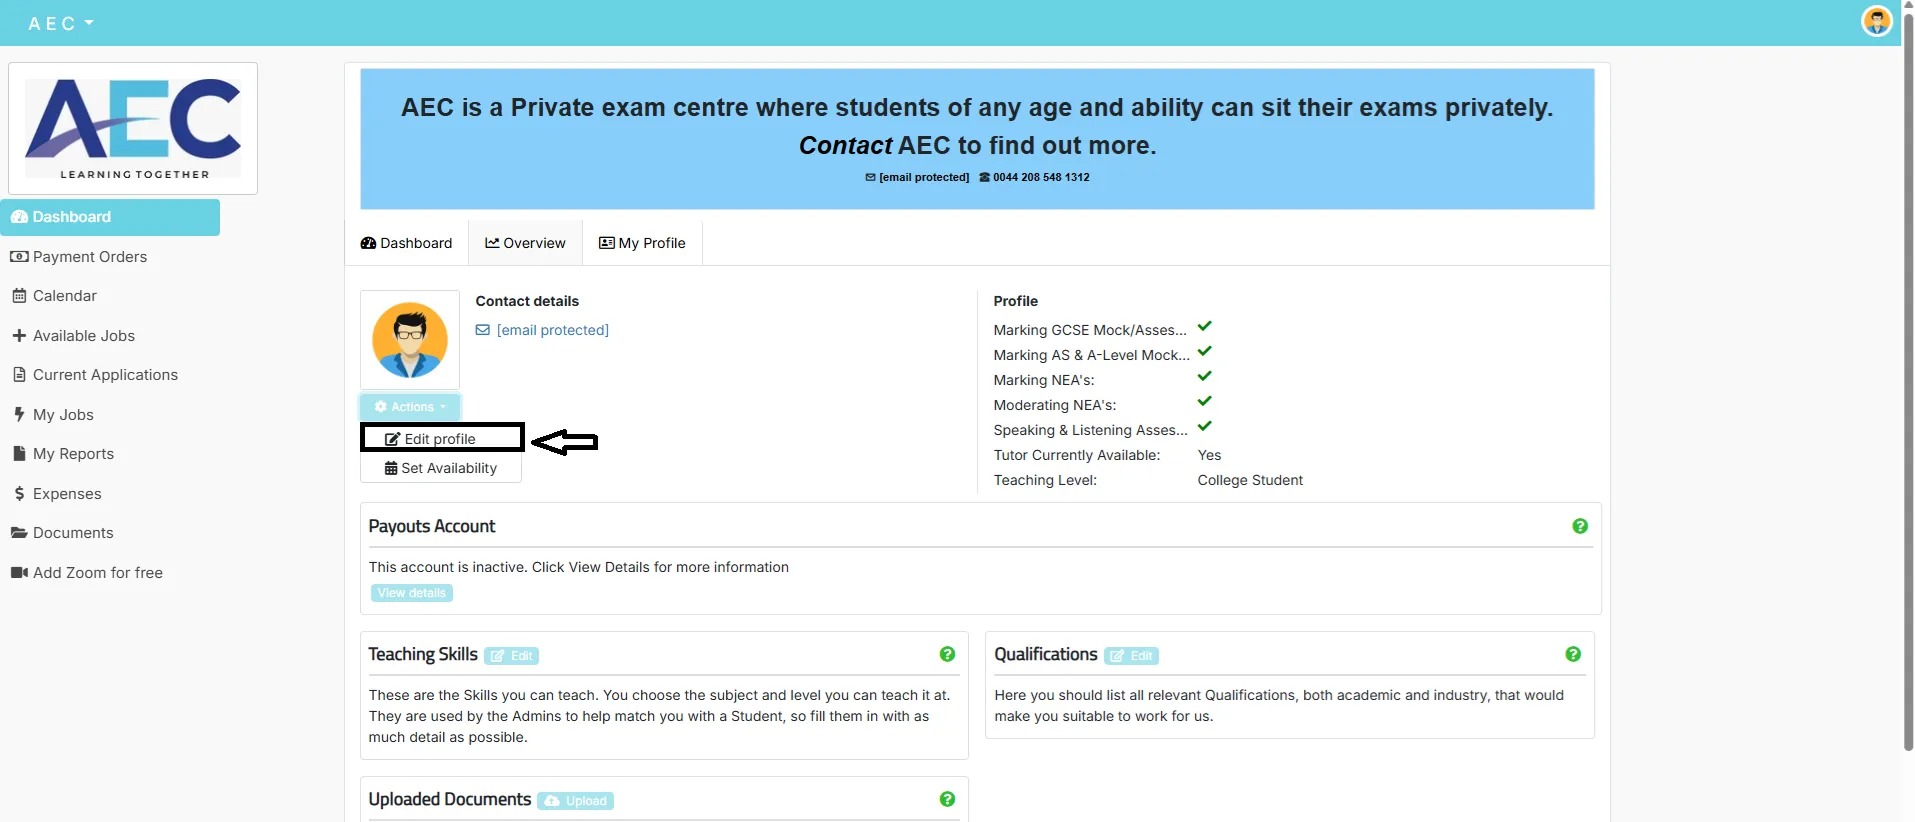
1. Sign up for a payouts account
- Go to My Profile in your dashboard.
- Find the Payouts Account panel.
- Click Sign up now.
- Complete the Stripe onboarding form with your details.
- Once done, you’ll return to Learn.AEC and your payouts account will be linked.
You have one Stripe payouts account across all TutorCruncher profiles.
2. View your payouts account
- Open My Profile on your dashboard.
- Click View details in the Payouts Account panel.
- See upcoming payouts, past payouts and access your account in Stripe.
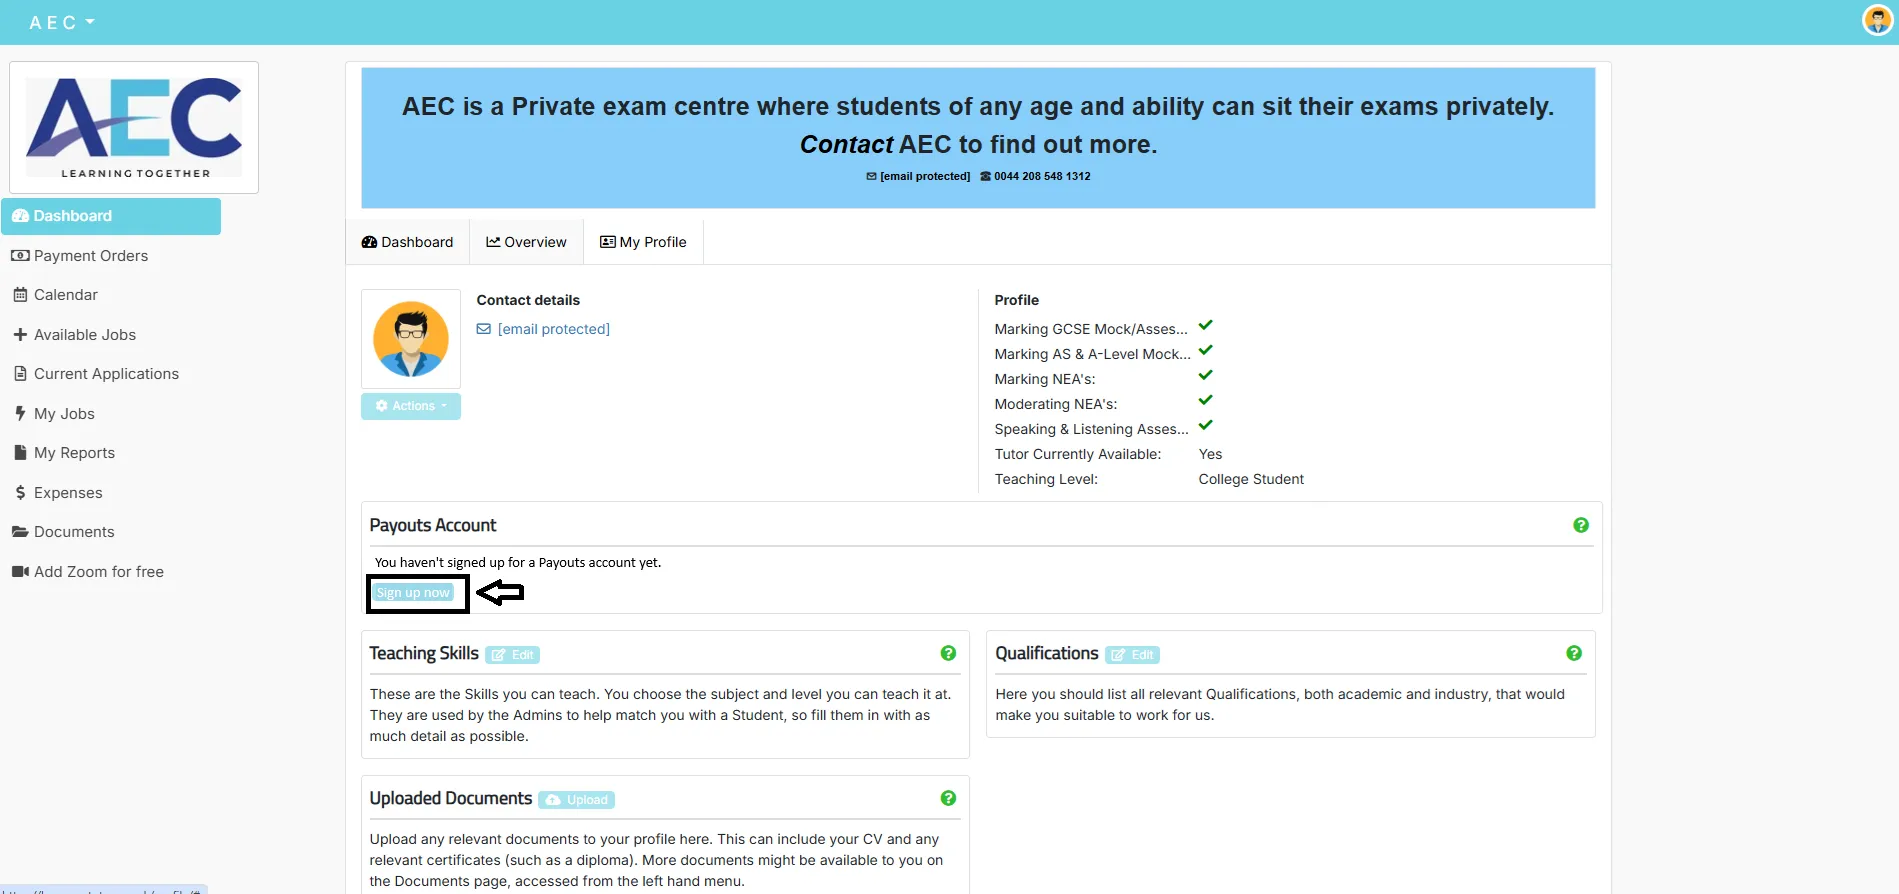
Payouts panel: check upcoming payouts, trigger manual payouts and open Stripe.
Automatic & manual payouts
- After a client pays, funds usually reach your Stripe payouts account in around 7 days.
- They are then sent to your bank on your chosen automatic payout date.
- You can request one manual payout per calendar month to move available funds earlier.
- Manual payouts can take up to 3 business days to reach your bank.
Change payout day & bank details
- In My Profile → Payouts Account → View details, click Change Payout day to choose your preferred date.
- The new date applies from the next month.
- To change bank details, click View Account in Stripe and update the Payout details there.
- Avoid changing details while payouts are still marked as “processing”.
Export transactions & international accounts
- In Stripe, go to Transactions and click Export to download a CSV of your payments.
- Stripe may charge a small conversion fee (for currency exchange) – this will be shown inside your payouts panel.
- You can use an international bank account if your Learn.AEC profile address matches your bank’s country.
Couldn’t find the right information?

© AEC Tutors